Shopify metafields explained: add the product details your store is missing.
Metafields add your own fields to Shopify products, like ingredients or size guides. How to set them up, show them on product pages and use them as filters.
Every Shopify product starts with the same fields: a title, a description, a price, images and variants. That's enough for a T-shirt. It isn't enough for a jar of ghee that needs ingredients, storage advice and a nutrition panel, or a laptop bag with a laptop size, a material and a warranty.
Most stores squeeze that extra information into the product description. It works until you want to show it in a neat tab, filter by it, or change the layout across 200 products. Metafields are Shopify's answer: extra fields you define once and fill in for every product, so the information lives in its own place and your theme can show it wherever it belongs.
This guide explains what metafields are, how to set them up step by step, how to show them on your product pages, and the mistakes worth avoiding.
What a metafield is, in one sentence
A metafield is a custom field you add to something in your store — usually products, but also variants, collections, customers, orders, pages or the shop itself — with a name, a type and a value.
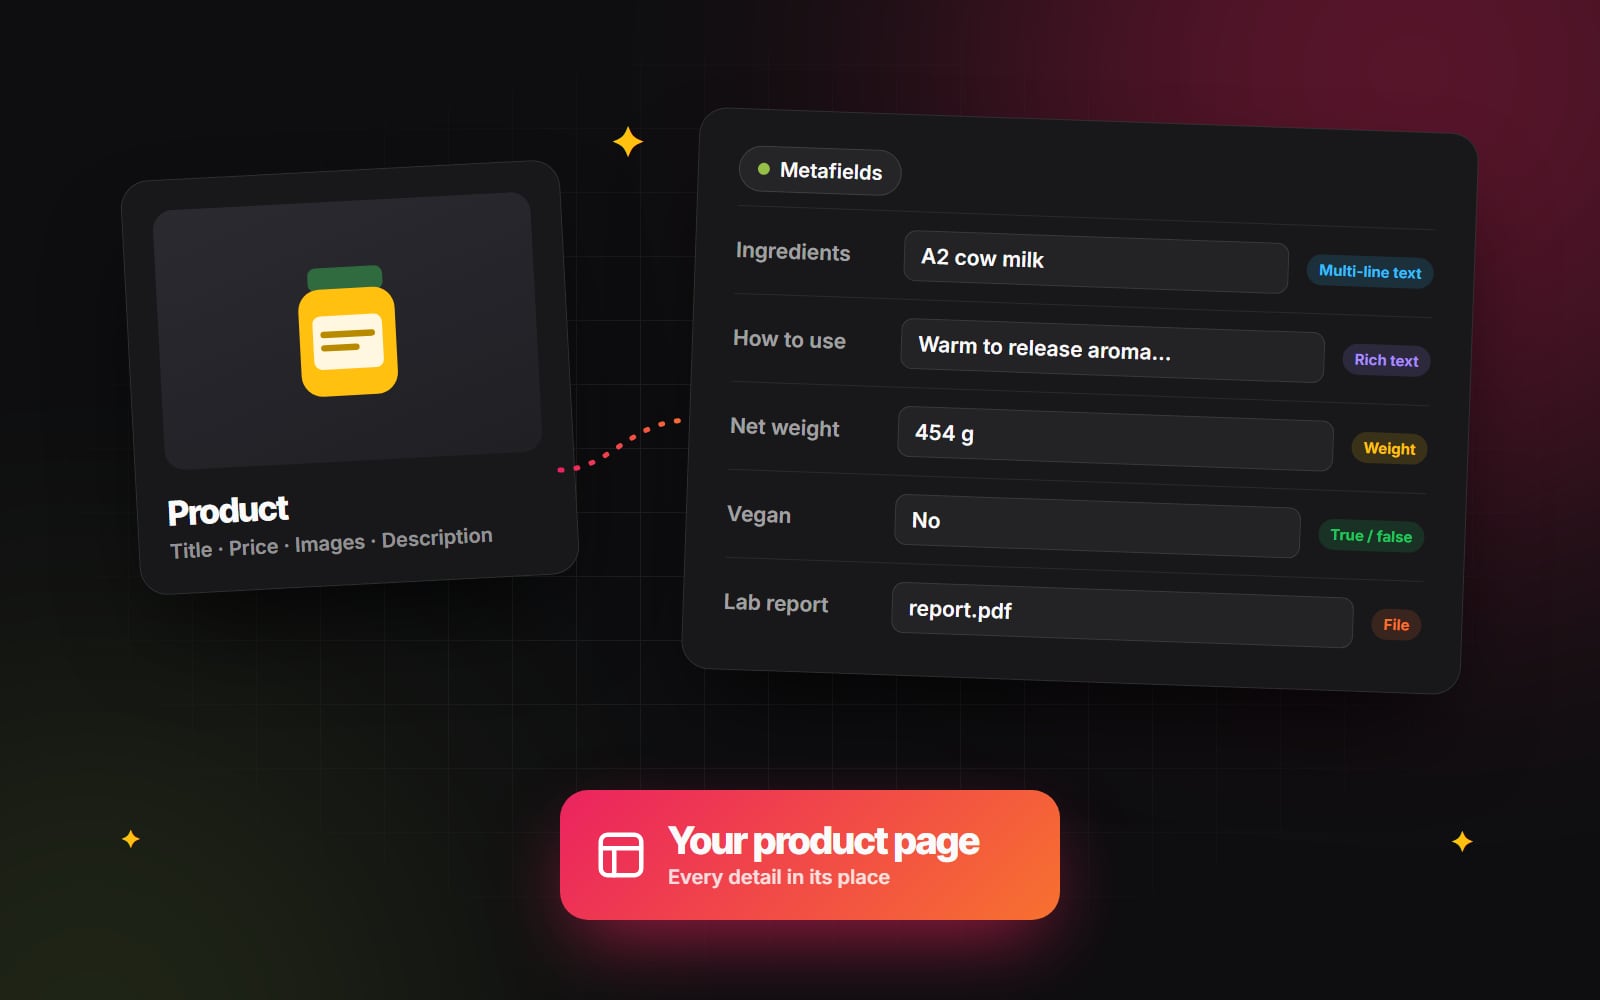
For example, a food store might add these product metafields:
- Ingredients — multi-line text
- How to use — rich text
- Net weight — a weight value
- Vegan — true or false
- Lab test report — a file
Each one has a definition (created once, in Settings) and a value (filled in on each product). Behind the scenes every metafield also has a namespace and key, such as custom.ingredients, which is how the theme finds it.
Why not just use the product description?
The description is one block of text. Anything inside it can only be shown as that block. Moving information into metafields gives you four things the description can't:
- 1 Layout control. Show ingredients in a tab, nutrition in a table and storage advice under the Add to cart button — on every product, from one template.
- 2 Consistency. Every product has the same fields in the same order, so nothing gets forgotten and nothing is formatted differently.
- 3 Filters. Typed values (such as true/false, numbers or a fixed list of choices) can power collection filters, so shoppers can narrow down to "vegan" or "under 500 g".
- 4 Easier editing. Your team fills in labelled boxes instead of editing a long description and hoping the formatting survives.
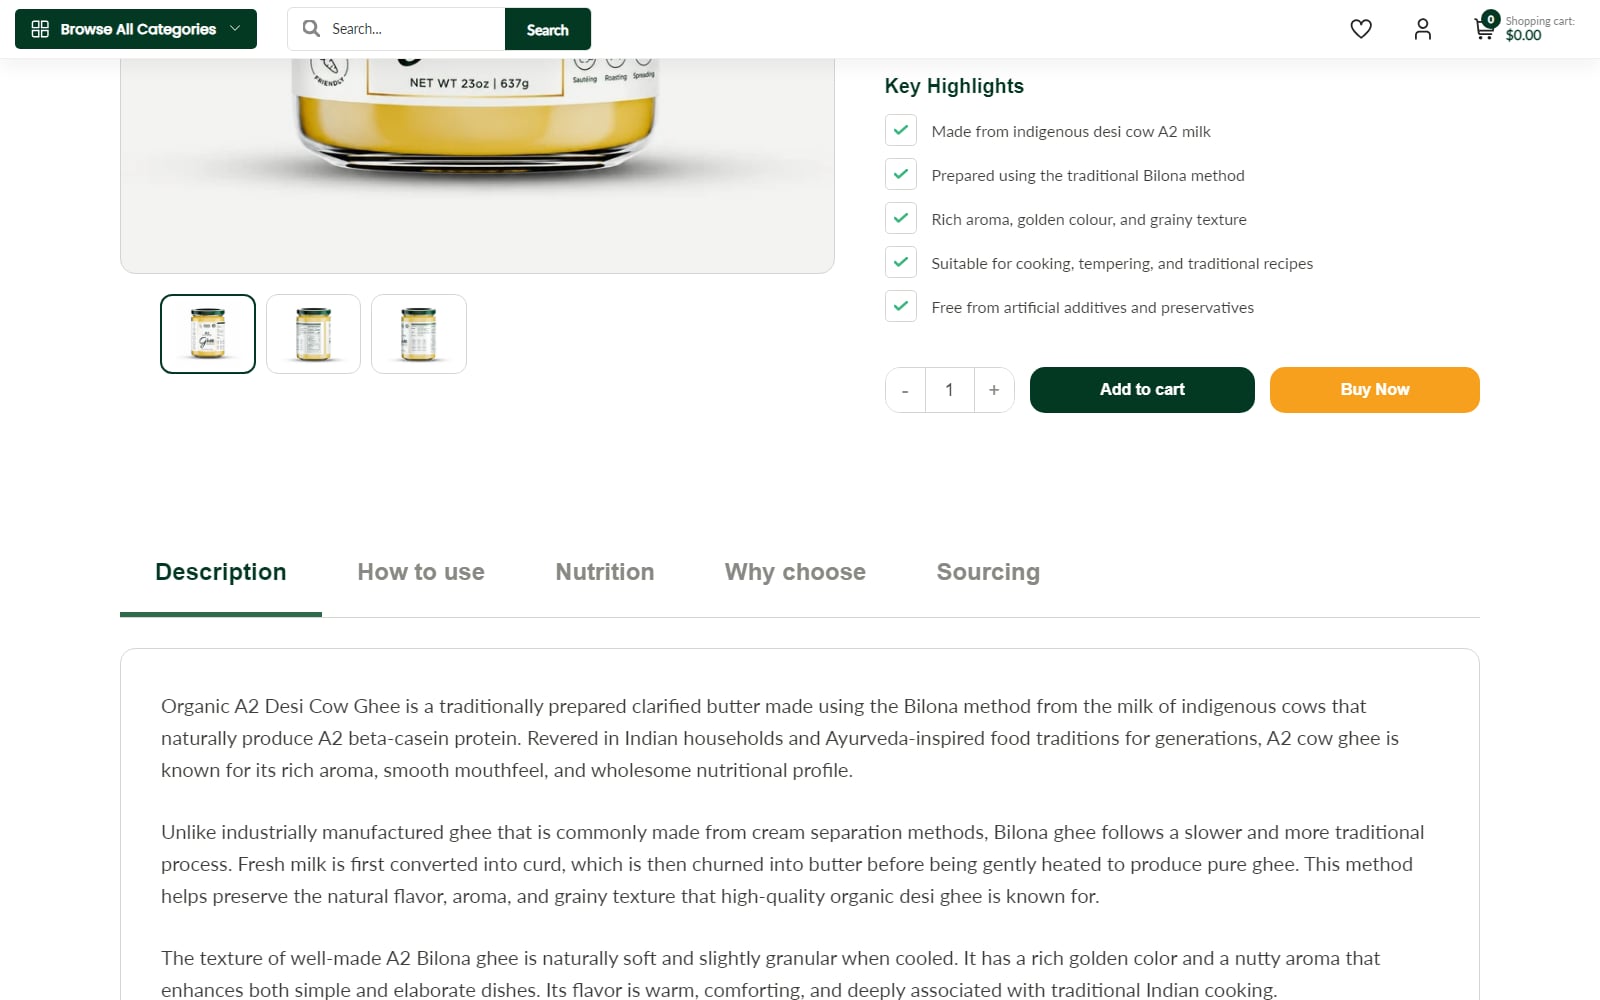
On the Organic Mandya store we built on Shopify, custom metafields hold each product's key highlights, how to use it, nutrition, sourcing and why to choose it. The theme places each one in the right section of the product page, and the team edits them without touching code.
How to create a metafield definition
Create the definition once and it appears on every product. In your Shopify admin:
- 1 Go to Settings.
- 2 Open Metafields and metaobjects. (On some stores this area is labelled Custom data.)
- 3 Choose Products.
- 4 Click Add definition.
-
5
Enter a Name, such as "Ingredients". Shopify suggests a namespace and key, such as
custom.ingredients. Keep it short and clear, because it's hard to change later. - 6 Add a Description telling your team what goes in the field, for example "Full ingredient list, as printed on the pack".
- 7 Click Select type and pick the type that matches the information (see the next section).
- 8 If a product can have several values, such as several certifications, choose the list option for that type.
- 9 Set any validations you need, such as a character limit or a minimum and maximum number.
- 10 Click Save.
Choosing the right type
The type decides what your team can enter and what the theme can do with it. Picking the right one up front saves cleaning up later.
- Single line text — short values such as a material or a country of origin.
- Multi-line text — plain lists such as ingredients.
- Rich text — formatted content with bold text, links and bullet points, such as usage instructions.
- Integer, decimal, weight, volume or dimension — measurements you may want to filter or sort by.
- True or false — yes/no facts such as "Vegan" or "Gift wrap available". These make the simplest filters.
- File — a PDF or image, such as a size chart or a lab report.
- Product or collection reference — a link to another product, for "pairs well with" or "refill pack" sections.
- Metaobject reference — a link to a structured entry you reuse across many products (more on this below).
A useful rule: if you'll ever want to filter or sort by it, don't store it as free text.
Filling in values on a product
- 1 Go to Products and open a product.
- 2 Scroll to the Metafields section near the bottom of the page.
- 3 Click a field and enter its value.
- 4 Click Save.
For many products at once, select them in the product list and use Bulk edit, where you can add metafield columns and fill them in like a spreadsheet. For large catalogues, a developer can also set values through Shopify's API.
Showing metafields on your product page
Filling in a metafield doesn't show it anywhere yet. You connect it to your theme. With an Online Store 2.0 theme you can usually do this in the theme editor, without code:
- 1 Go to Online Store > Themes and click Customize.
- 2 Switch the page selector at the top to Products and choose the default product template.
- 3 In the product information section, click Add block and choose a block that takes text, such as Text or a collapsible tab.
- 4 In the block's settings, click the Connect dynamic source icon next to the text field.
- 5 Choose your metafield, such as Ingredients.
- 6 Click Save.
Every product now shows its own ingredients in that block. If a product's metafield is empty, most themes hide the block for that product.
When the theme editor can't place a value where you want it — inside a custom tab, a comparison table or a badge on the product image — a developer adds it to the theme's Liquid code. A rich text metafield, for example, is output with {{ product.metafields.custom.how_to_use | metafield_tag }}. This is the kind of work that goes into custom Shopify themes, where each product page is designed around the information your products really have.
Metaobjects: when the same details repeat across products
Some information is shared. Twenty products might all carry the same "Certified organic" badge with the same icon and explanation. Typing that into twenty metafields is slow and easy to get wrong.
Metaobjects solve this. You define a structure once — for example, a "Certification" with a name, an icon and a short description — create each certification as an entry, then point each product at the entries that apply. Update the entry and every product that uses it updates too.
Metaobjects suit anything you'd otherwise copy and paste: certifications, care instructions, designer profiles, ingredients with their own descriptions, or size guides shared by a whole range.
Using metafields as collection filters
Shopify's free Search & Discovery app lets you add filters to your collection and search pages, and product metafields can be among them. Filters work best with typed values: true/false, numbers, and single line text with a fixed set of choices.
- 1 Install and open the Search & Discovery app.
- 2 Go to Filters and click Add filter.
- 3 Choose the product metafield you want to filter by.
- 4 Click Save, then check a collection page to see the new filter.
Also look at Shopify's category metafields. When you assign a product to a category from Shopify's standard product taxonomy, Shopify suggests standard attributes for it, such as colour, size or material. Using those where they fit keeps your data consistent, and Shopify can use them in filters and in the product data it shares with sales channels.
Mistakes we see most often
- Too many definitions. Thirty fields nobody fills in is worse than eight that are always complete. Start with the information shoppers ask about before buying.
- Free text where a type fits. "Yes", "yes " and "Y" are three different values to a filter. Use true/false or a fixed list instead.
- Vague names. "Info 2" means nothing in a year. Name fields after what they hold and add a description.
- Changing the type later. A definition's type is hard to change once products have values, so decide before you fill in the catalogue.
- Hard-coding content in the theme. If text sits in the theme code, only a developer can update it. Put product facts in metafields and keep the theme for layout.
- Forgetting translations. If you sell in more than one language, check that your translation app or process covers metafield values too.
Planning metafields for a new store or a migration
The best time to plan metafields is before products go in. When we set up a store or move one to Shopify, we list every piece of product information the old site or the supplier sheets hold, decide which belong in standard fields, which need metafields and which should be metaobjects, and map them before import. It's one of the steps in our Shopify migration checklist, and it makes the product page design much easier, because the designer knows exactly what information exists.
If you're redesigning your product pages anyway, our guide to the anatomy of a Shopify product page that converts covers which information to show, and where.
Need a hand?
We plan and build metafield structures, metaobjects and the product templates that show them, as part of Shopify store setup and product page work. If your product information has outgrown the description box, tell us about your store and we'll suggest a structure that fits your catalogue.
Planning something similar?
Tell us what you're building and we'll come back with ideas and next steps.